![]()
![]()
![]()
Error pages inform visitors about problems when they attempt to access your site. The Error Pages interface in cPanel allows you to create custom error pages for any HTTP status code.
You can log in to your cPanel account directly or within the client portal (If you cannot remember your password, there is a password reset link).
Step 1 (a) - Logging into cPanel directly
You can log in directly to your cPanel account by using your domain name followed by /cPanel in the URL.
e.g - https://domainname.co.uk/cpanel (Note, please change domainname.co.uk to your own domain name)
Step 1 (b) - Logging into cPanel via the Client Portal
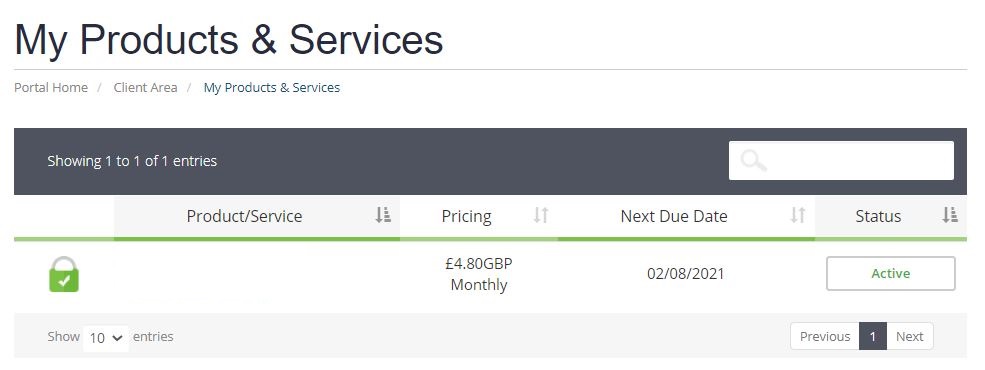
Once logged in to your client portal, click on the 'Services' tab and then 'My Services. Select the 'active' button (under the 'Status' column) for the service you wish to update.
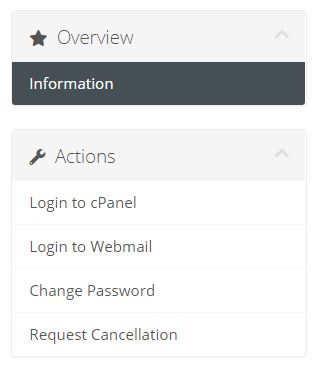
On the left-hand side, you will see the 'Overview' section. Click on 'Login to cPanel'.
Step 2
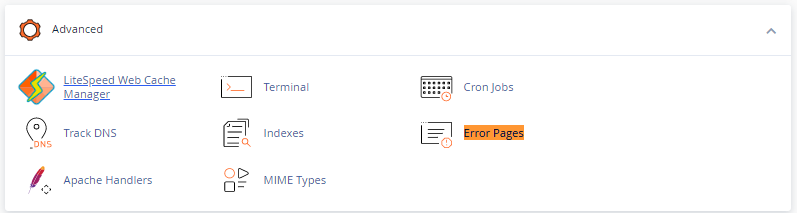
Once logged into your cPanel account, scroll down to the Advanced section, and then click on Error Pages.
Step 3
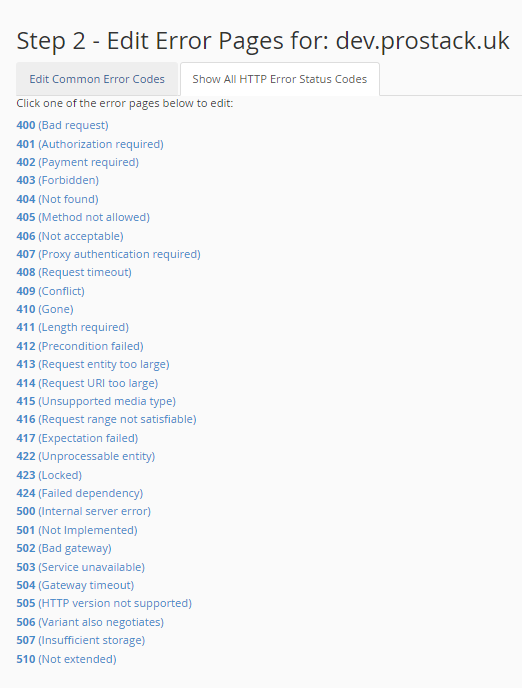
Firstly, if this account manages multiple domains, select the domain (from the drop-down) that you wish to edit to an error page.

Step 4
Click the error status code for which you wish to edit its error page.

Note: If you do not see the error status code that you need in the list, click the Show All HTTP Error Status Codes tab.
Step 5
Enter a message in the text box.
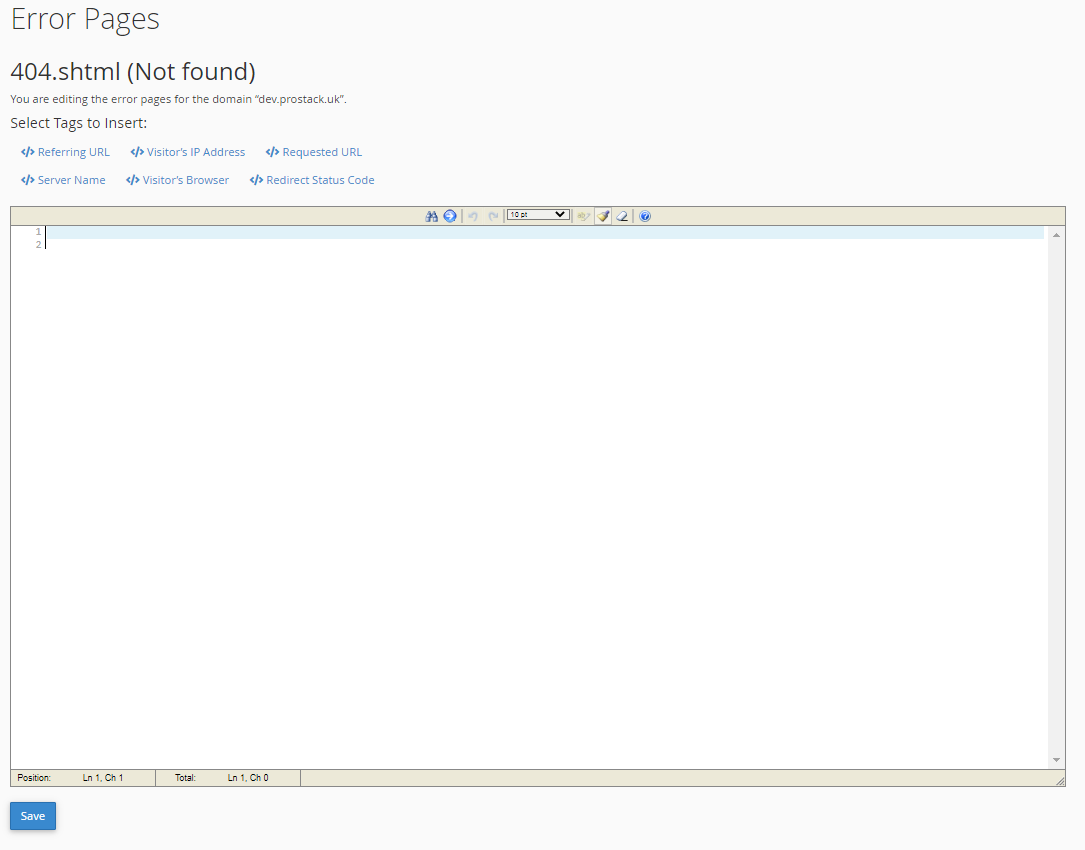
Enter additional HTML code to further customise your error pages and then click Save.
Need further assistance?
If you require further assistance please contact the ProStack team and we can help get this resolved for you! Get in touch today!

![]()
![]()
![]()
