![]()
![]()
![]()
We are sure most of you have come across this frustrating question.
This article will help identify why your emails are going to the Spam/Junk folder and offer advice and information on how to avoid the spam filters from tagging your emails.
Authenticating your Emails
To authenticate your emails, you can add an SPF, DKIM, and DMARC record. This is key in verifying legitimate emails.
- SPF (Sender Policy Framework) - It's a TXT record that helps the receiving mail-server to verify that the incoming mail from a specific domain comes from an IP Address authorised by that domain’s mail hosting server. You can learn how to enable the SPF record here.
- DKIM (DomainKeys Identified Mail) - It uses an encryption method to authorise an email sender and its content. The encryption generates a pair of keys, where one of them is added as a TXT record along with a mail signature for the receiving mail server to decrypt. Learn more on enabling DKIM record from cPanel here - How do I enable DKIM Record
- DMARC (Domain-Based Message Authentication Reporting and Conformance) - It is an authentication method that uses both SPF and DKIM to verify whether or not an email was actually sent by the owner of the "from" domain that the user sees. While adding a DMARC record, you will need to apply one of the policies:
None: Treat all mail sent from your domain as it is, without any validation.
Quarantine: The recipient server would accept the mail, but should place it somewhere other than the recipient’s inbox (usually, the spam folder).
Reject: Reject the message.
Clear and concise subject lines
Choosing the right subject line is crucial and will determine if a user would like to read your email.
It's also important to not choose common spam words/phrases so that the recipient spam filtering system isn't triggered. Some of the common phrases to avoid:
- FREE!
- Call now!
- Instant
- Urgent!
- Order now!
Have an OPT-IN process for your subscribers
Having a genuine list of email addresses and collecting them plays a large role in deliverability. To achieve this use the Confirmed OPT-IN or a Double OPT-IN method. Both of these methods send a confirmation email to the subscriber of the list and help to ensure that this user is ready to accept emails from you.
Sending the right amount of emails
Over time major ESPs like Google, Yahoo, Outlook, etc. identify patterns in the messages they receive and make appropriate changes to their metrics. However, it is always essential to avoid a sudden spike in emails being sent out which would alert the ISP to a possibility of a spam sender and eventually deny mails from it or even put them on a block list. We recommend every user adhere to the policies set by these major ESPs.
Maintain a clean list
Sending your marketing emails to non-existing users results in bounce-back messages and when this bounce rate is high, it affects your sending credibility. So, providing your users an easy way to unsubscribe helps in this case but it is also important to scrub your mailing list on a regular basis.
Ensuring your IP address isn't blacklisted
You may check your server IP address reputation from MXToolbox. The IP address is queried into multiple blacklist agencies and the results are listed depending on the response received. If you notice your IP address on one of the blocklists, please ticket us and we'll help you deal with it.
Why would my email get bounced back?
An email bounce is received when the intended mail doesn't get delivered to the recipient server for some reason and the recipient server sends a delivery report mentioning the cause for the failure.
This delivery report is often referred to as a bounce-back message. If one of your emails was rejected by the recipient server you may diagnose the errors mentioned within the delivery report sent to you.
Reasons for receiving a bounceback error could be due to the following:
- Mailbox full: When the recipient's mailbox has reached its capacity and it cannot accept any further emails; this message will be reported in the bounce back you receive.
- Disk space full: The account user has exhausted the allocated disk space. This mainly occurs for customers on our shared hosting services, when the assigned storage space for the package allotted is used up. If you happen to encounter this error, please feel free to contact our support and we'll get this sorted for you. On the other hand, you may also look at upgrading your package - more details on our hosting packages and pricing can be found here.
- Email Size: If the message you are trying to send contains huge attachments or too much content that exceeds the maximum size threshold for a message, this delivery report is received. By default on cPanel servers, the size limit is set to 50 MB per message/email.
- Email Blocked/Email Rejected: An email could be blocked for many reasons, for eg; too much spam content going out, server IP address on the recipients block list, etc. For these types of bounce messages, you'll need to investigate the mail logs in order to identify the cause and diagnose accordingly.
- Incorrect Email address: Incorrect email address bounce mails are often flagged as "Invalid email address" or "User does not exist". This happens when the supplied email account as the TO address is incorrect or misspelled.
- Access Denied: This bounce message is reported when the IP address of the machine you are trying to connect from is temporarily or fully blocked on the server firewall. This happens when there is an email misconfiguration on an email client for some device using the same network or it must be due to the wrong password entered while trying to authenticate with the server. If you find yourself blocked by the firewall on the server do open a ticket with us.
- Server down: The mail hosting server is unable to reach or is currently inaccessible.
Where can I check for logs?
The errors received on the bounce-back messages are mostly self-explanatory and often contain details that triggered it. However, in certain cases, it becomes necessary in order to confirm the culprit/reason and hence require checking email logs. WHM has an option for this and is available at Home >> Email >> Mail Delivery Reports. Customers on shared hosting packages, unfortunately, do not have access to "Mail Delivery Reports" and hence will require opening a support ticket. For customers on Reseller Hosting, Cloud, and Dedicated server packages the option is accessible once you've logged into your WHM panel.
When you click on it, a page is displayed (as seen from the clip below) where you may generate reports by entering specific from and to date or even search for a particular pattern in reference to the email that you've tried to send.
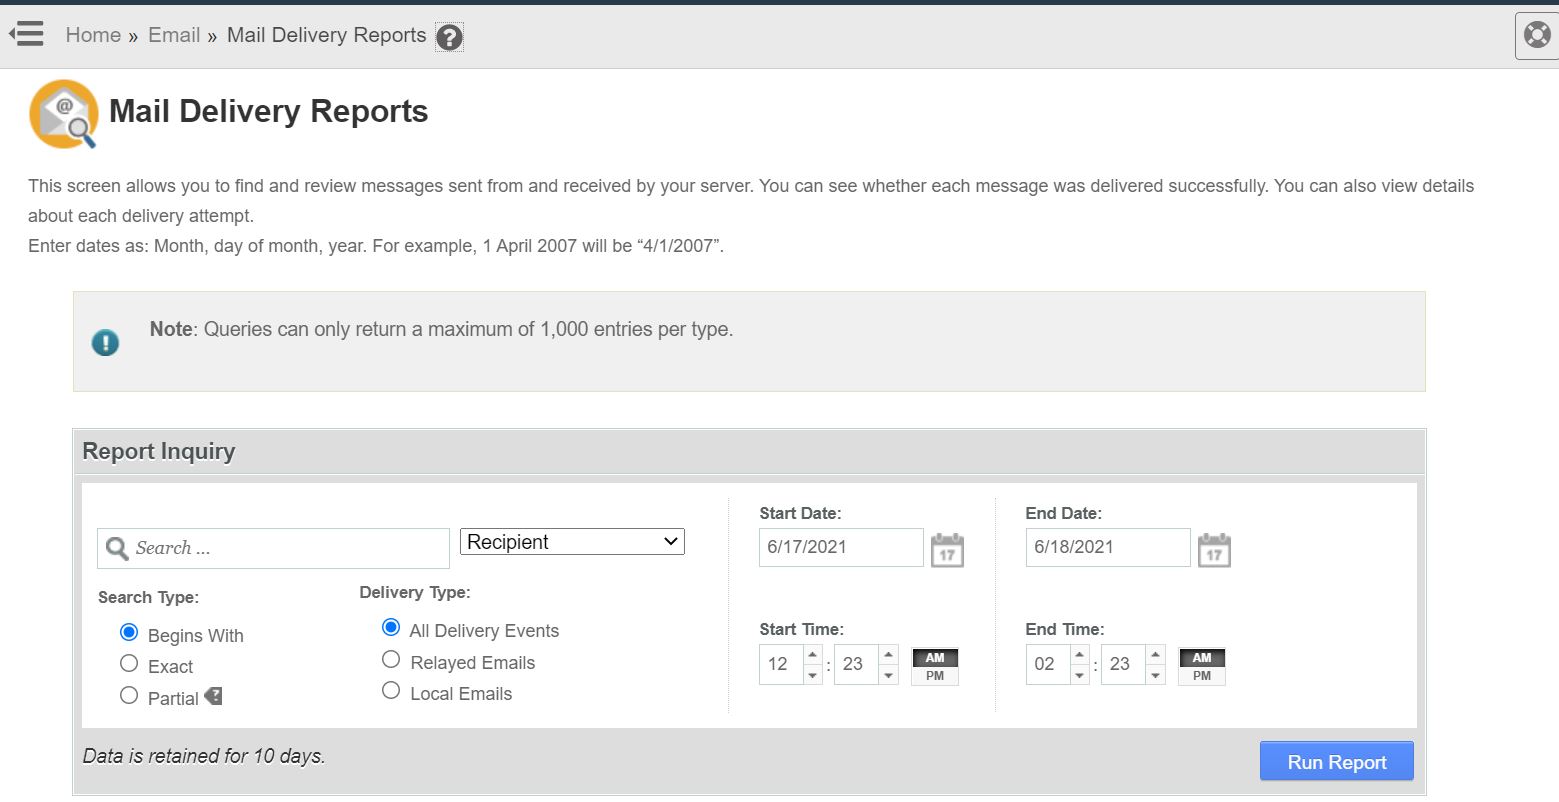
A report is then generated based on your submissions which should help you investigate the mail problem. A more detailed explanation can be found on cPanel Docs.
Need further assistance?
If you require any further help, our friendly team is on hand to advise. Get in touch today!

![]()
![]()
![]()
