![]()
![]()
![]()
You can add or manage your DNS records from your cPanel account.
You can log in to your cPanel account directly or within the client portal (If you cannot remember your password, there is a password reset link).
Step 1 (a) - Logging into cPanel directly
You can log in directly to your cPanel account by using your domain name followed by /cPanel in the URL.
e.g - https://domainname.co.uk/cpanel (Note, please change domainname.co.uk to your own domain name)
Step 1 (b) - Logging into cPanel via the Client Portal
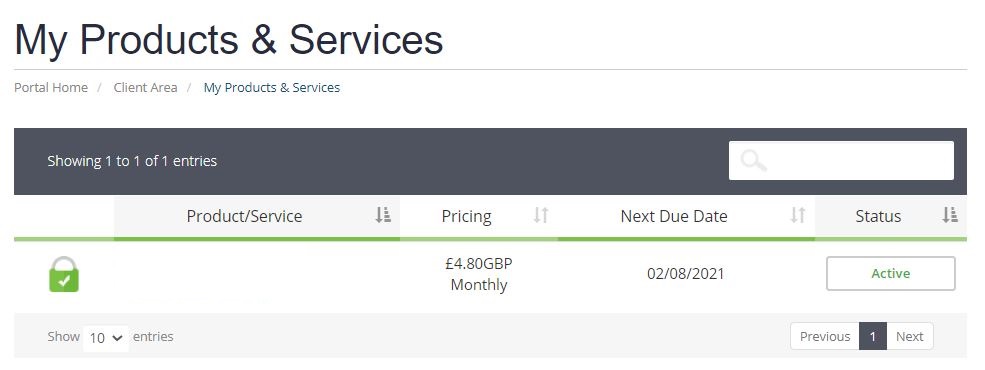
Once logged in to your client portal, click on the 'Services' tab and then 'My Services. Select the 'active' button (under the 'Status' column) for the service you wish to update.
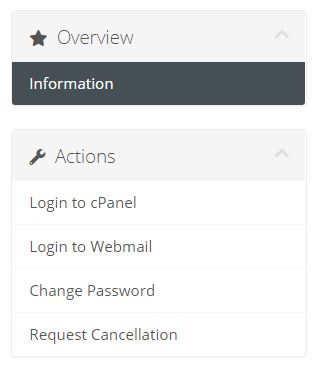
On the left-hand side, you will see the 'Overview' section. Click on 'Login to cPanel'.
Step 2
Once logged into your cPanel account, scroll down to the 'Domains' section, and then click on 'Zone Editor'.

Step 4
You can add and manage your DNS records.
Need further assistance?
If you require further assistance please contact the ProStack team and we can help get this resolved for you! Get in touch today!

![]()
![]()
![]()
