In addition to the backups we provide, we recommend customers take their own backups of their websites as needed.
Take a look at our website for more information about our backups. Alternatively, read our blog post which discusses our backup policy and how you can do your own testing of your backups.
For example, if you're about to perform some maintenance on your site, it's useful to have a copy, in case something goes wrong.
cPanel provides an interface to allow you to take and restore backups quickly and easily. These are found in the "backups" section of the cPanel main page.
You can log in to your cPanel account directly or within the client portal (If you cannot remember your password, there is a password reset link).
Step 1 (a) - Logging into cPanel directly
You can log in directly to your cPanel account by using your domain name followed by /cPanel in the URL.
e.g - https://domainname.co.uk/cpanel (Note, please change domainname.co.uk to your own domain name)
Step 1 (b) - Logging into cPanel via the Client Portal
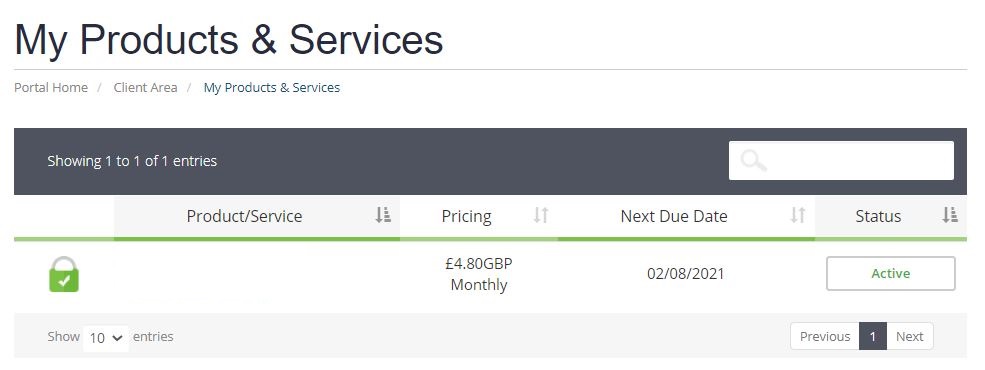
Once logged in to your client portal, click on the 'Services' tab and then 'My Services. Select the 'active' button (under the 'Status' column) for the service you wish to update.
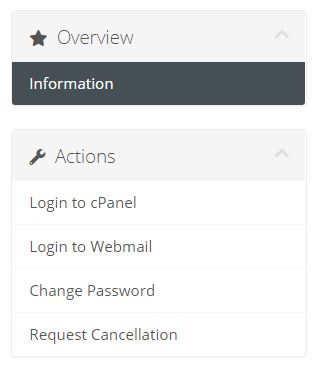
On the left-hand side, you will see the 'Overview' section. Click on 'Login to cPanel'.
Step 2
Once logged into your cPanel account, scroll down to the "Files" section and click on "Backup Wizard" icon.

Step 3 - Using the backup wizard
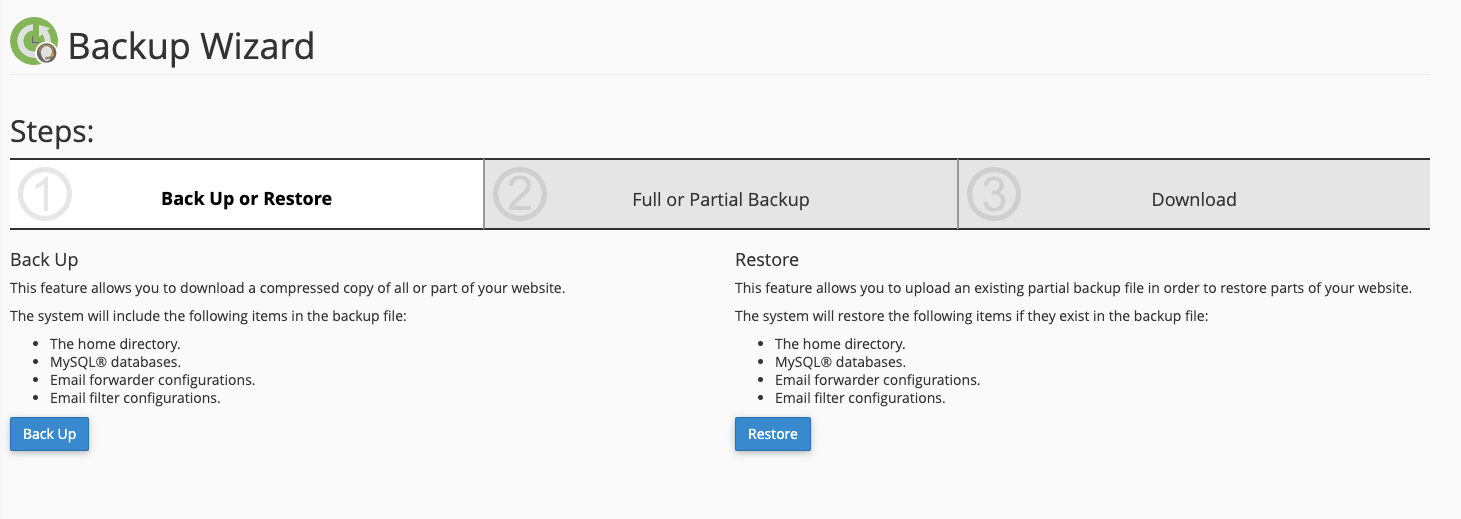
The backup wizard guides you through the process of backing up or restoring your site. You can choose several options to backup or restore:
- Your home directory (including site files and email).
- Your site databases
- Email configuration
Step 2
Follow the wizard by selecting the appropriate option. If you're backing up, the system will generate compressed files and prompt you to download it.
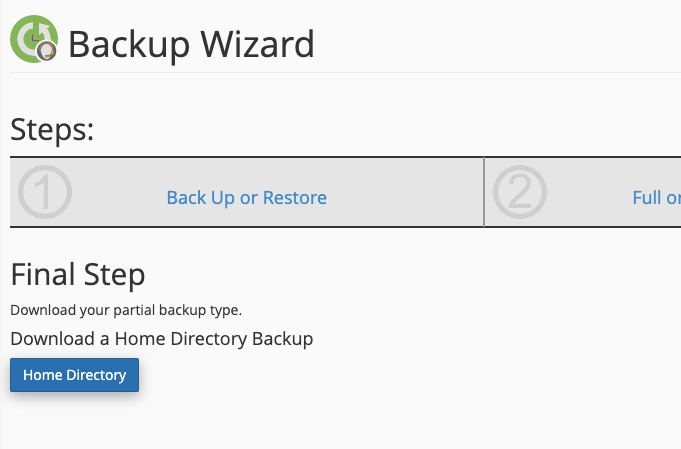
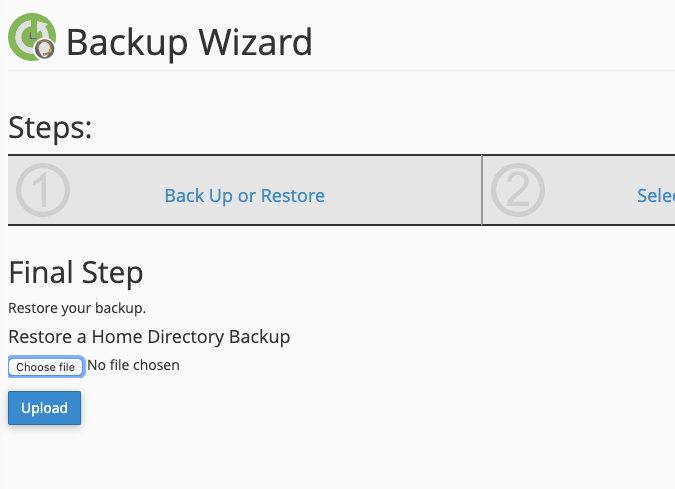
If you wish to restore files from the backups you've taken, the process is similar- follow the wizard until you are prompted to upload a file.
Step 4
From here, select the file you previously downloaded and click "Upload".
Step 5 - Using the "Backups" Interface
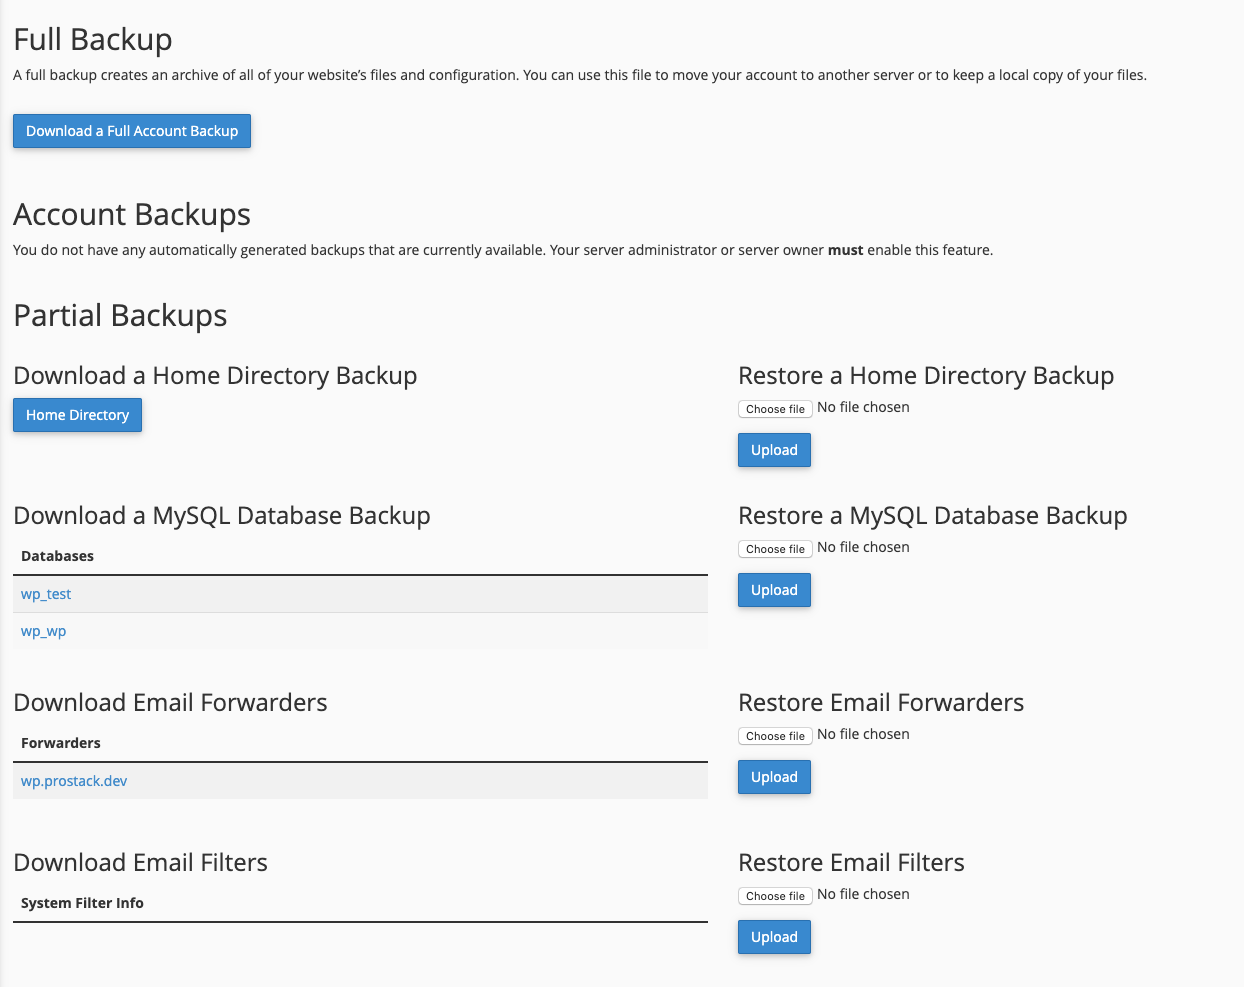
For more advanced users you can use the "Backups" link in cPanel to take and restore backups of your files.

You can click each link to download them or restore using the options on the right-hand side.
Step 6 - Taking a full Backup
A "Full" backup contains everything needed to restore your cPanel account - files, MySQL databases, and email data. The system generates a compressed file for you to download.
Note that a Full backup cannot be restored via cPanel - instead, you must contact our support so that we can do it for you.
Need further assistance?
If you require further assistance please contact the ProStack team and we can help get this resolved for you! Get in touch today!


