![]()
![]()
![]()
This article will explain how you can blacklist and whitelist email addresses and domain names using Spam Filters (Spam Assassin) in your cPanel account.
Blacklisting an email address will block emails from the sender from reaching your inbox.
By whitelisting an email address, the email will bypass the Spam Filters and will be delivered to your email account inbox.
Step 1 (a) - Logging into cPanel directly
You can log in directly to your cPanel account by using your domain name followed by /cPanel in the URL.
e.g - https://domainname.co.uk/cpanel (Note, please replace domainname.co.uk to your own domain name)
Step 1 (b) - Logging into cPanel via the Client Portal
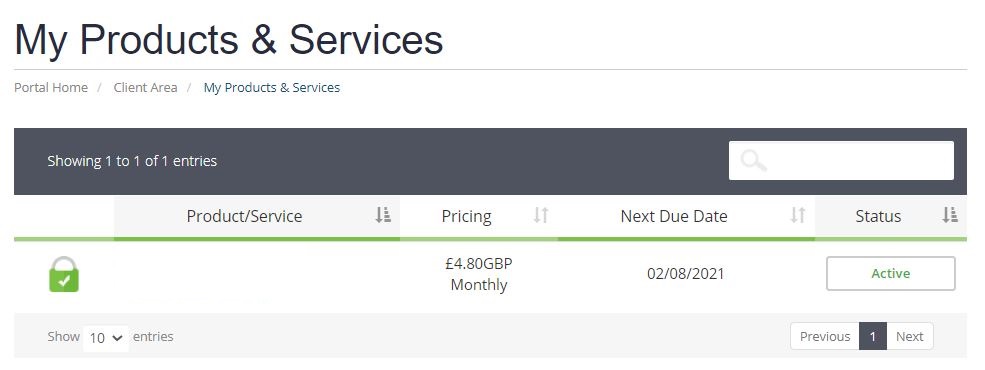
Once logged in to your client portal, click on the Services tab and then My Services. Select the Active button (under the Status column) for the service you wish to update.
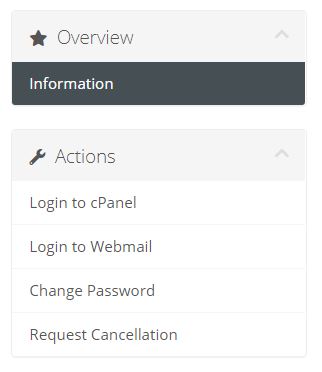
On the left-hand side, you will see the Overview section. Click on Login to cPanel.
Step 2
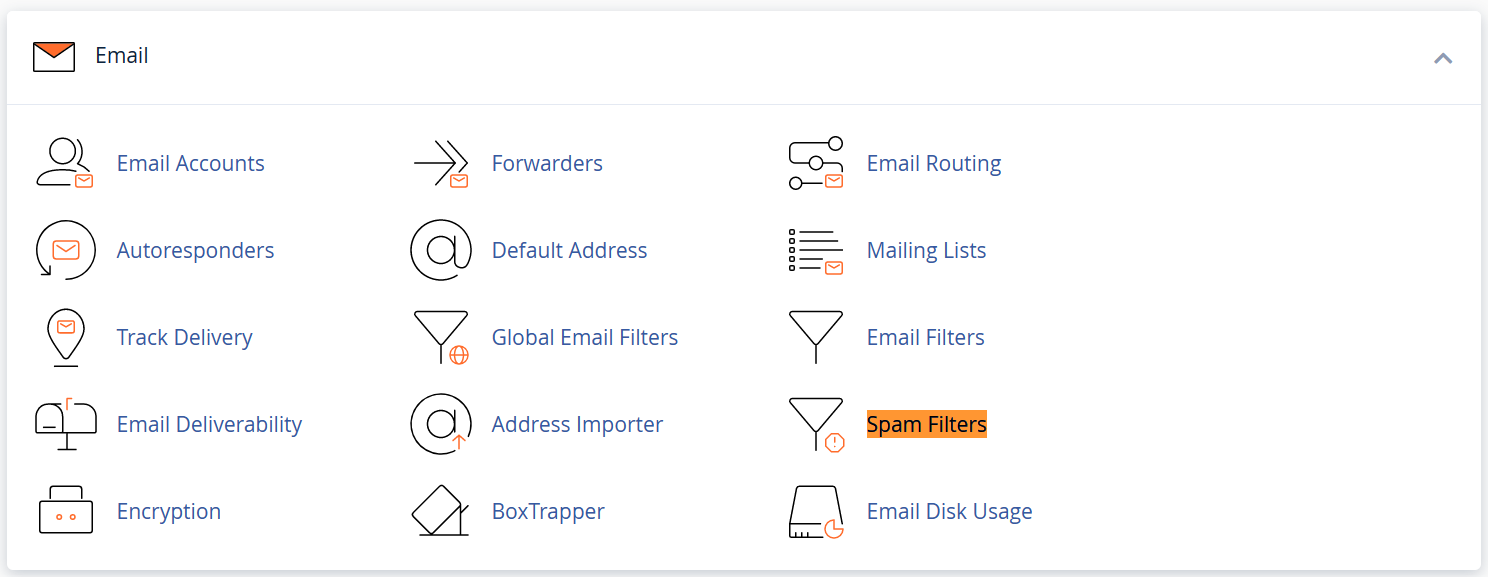
Once logged into your cPanel account, scroll down to the Email section and click on Spam Filters.
Step 3
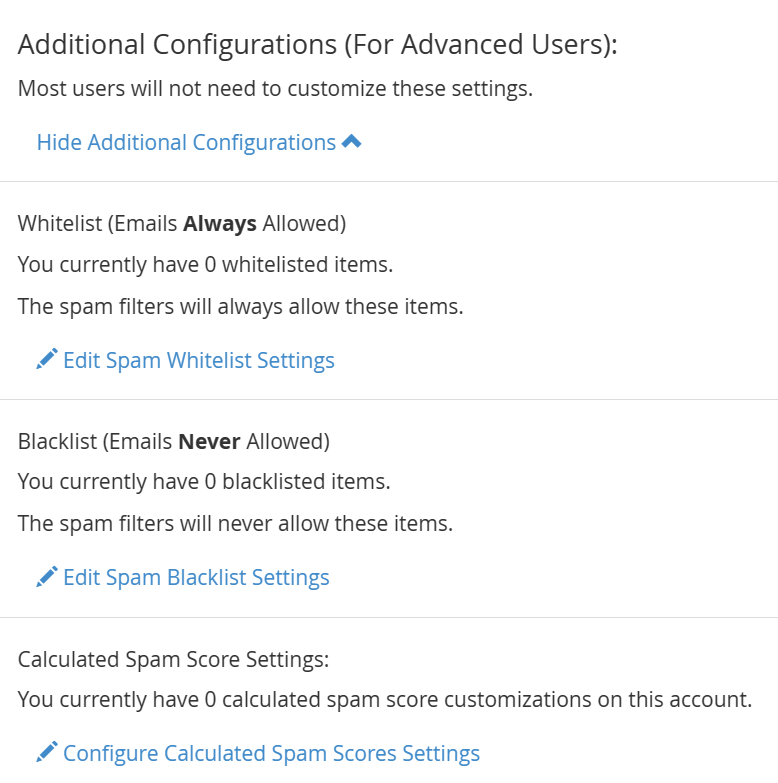
Scroll to the section Additional Configurations (For Advanced Users): and click on Show Additional Configuration.
Step 4
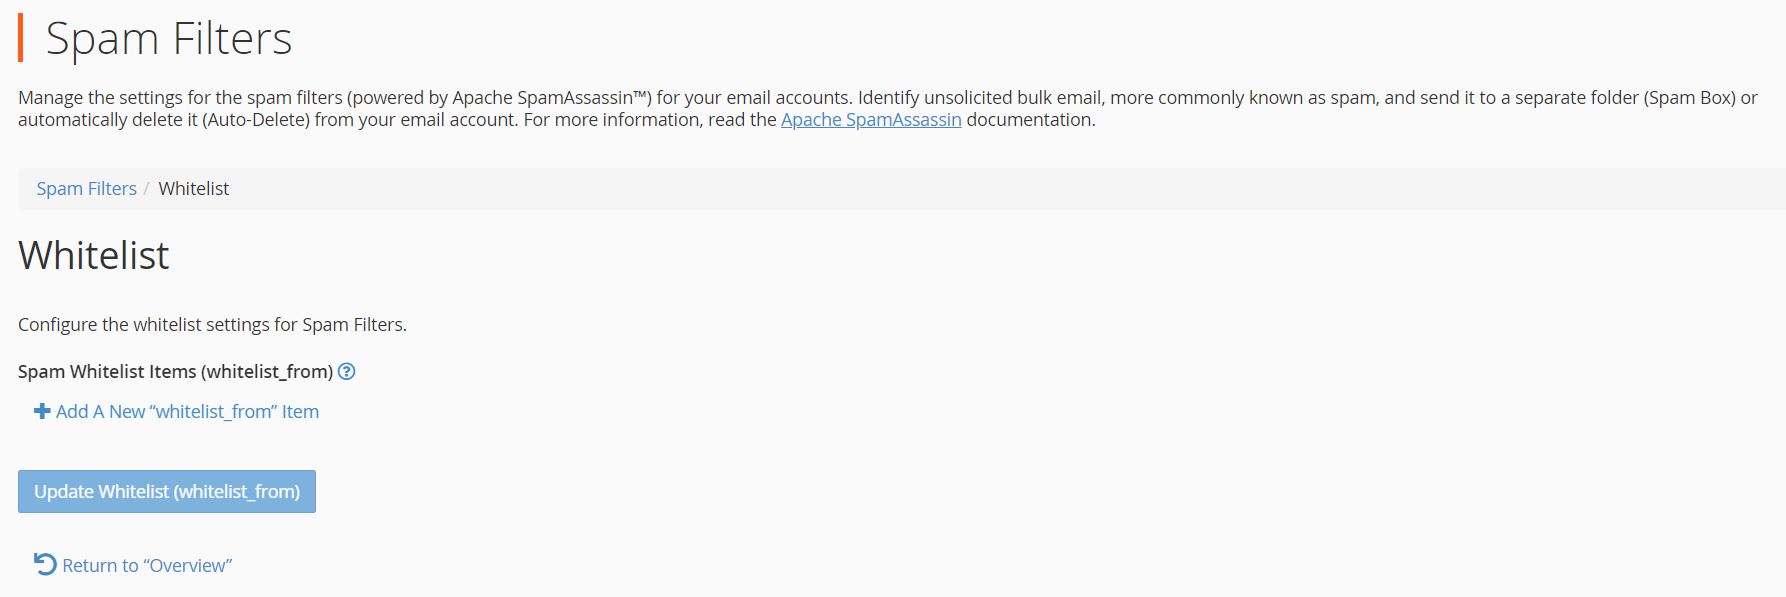
To Whitelist an email address, click on Add A New whitelist_from Item and type in the required information. Click Update Whitelist (whitelist_from).
Step 5
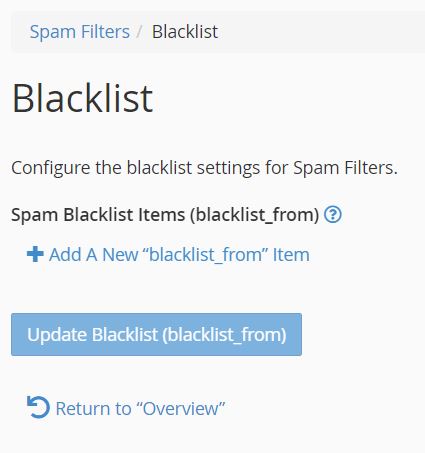
To Blacklist an email address, click on Add A New blacklist_from Item and type in the required information. Click Update Blacklist (blacklist_from).
Need further assistance?
If you require further assistance please contact the ProStack team and we can help get this resolved for you! [Get in touch today!]

![]()
![]()
![]()
