![]()
![]()
![]()
DKIM (DomainKeys Identified Mail) is an email authentication standard to make sure the email messages aren’t altered while in transit from the sending to the recipient servers.
It uses cryptographic techniques - encryption using the private key/public key pair.
How does DKIM work?
This standard requires the addition of the public key as a modified TXT record for your domain. It should be available to all the recipient mail servers to verify the email message that is received at their end.
This verification process includes the following steps:
- The mail is signed with a private key which is saved on the sending server and this signature is then added to the email headers as it leaves the server.
- The recipient server then retrieves the public key from the domain’s DNS using the selector obtained from the email headers to verify the source of the message, and that the body of the message hasn’t changed during transit.
- Once the signature is verified with the public key by the recipient server, the message passes DKIM and is considered authentic.
What is a DKIM selector?
A DKIM selector is a random string embedded within the email signature header, which helps the receiving server to identify the public key portion of the DKIM key pair from DNS.
How to enable DKIM?
Customers can enable DKIM records from cPanel. It's recommended to have it enabled when using your server for mails.
Requirements:
- Access to cPanel or WHM.
Step 1 - Enable DKIM record from cPanel
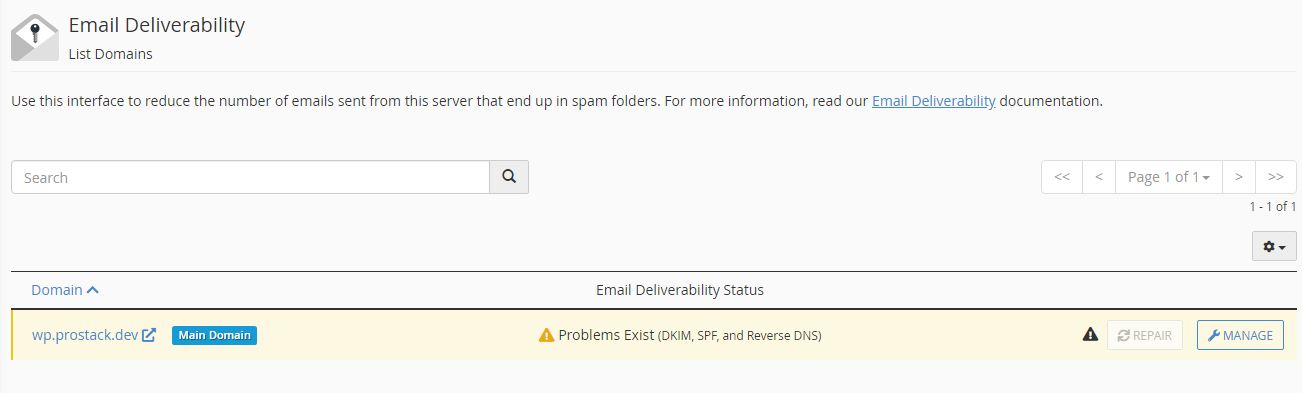
Log into cPanel and click "Email Deliverability" under the "Email" section.

Step 2
You will be redirected to a page with a list of domains and their respective deliverability status. Click on the "Manage" button displayed for the domain you wish to add/modify the DKIM record.
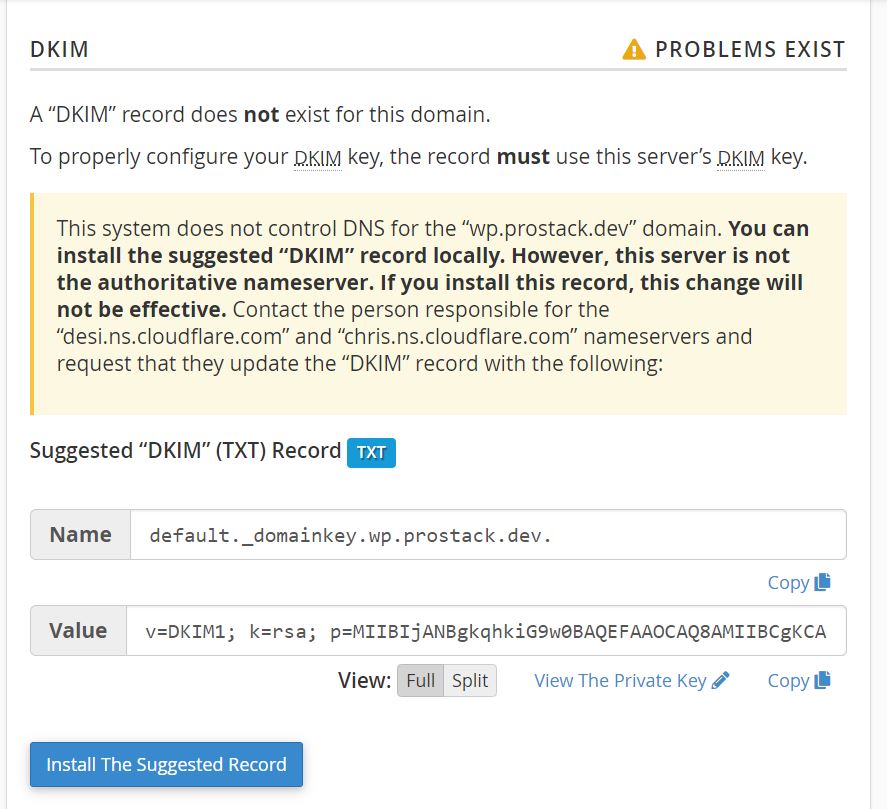
Step 3
Scroll down to "DKIM" section. There, you will find boxes that are mentioned as Name and Value, which will be automatically generated by the cPanel server. The Name section will have the "selector.domain_name.com" mentioned and the "Value" section will have the DKIM record for the server.
Both these sections can be used to edit the DKIM that's generated. When done, click on "Install the Suggested Record".
Step 4
You are all done here! The DKIM record is now added to your domain's DNS. You can verify the added record [here].
What if you're not my mail service provider?
If your domain's DNS belongs to us but you use a remote mail service provider like outlook, gmail etc. Please contact your corresponding mail service provider for the DKIM record details.
Once you have the necessary DNS record information, follow the steps mentioned above. At step 3 replace the "Name" and "Value" sections with the ones you've been provided with.
What if my DNS is not hosted with you?
You can add the suggested record cPanel generates, to your external DNS as a TXT record. If you’re not sure how to do this, speak to your DNS provider.
More information with respect to DKIM found here: https://docs.cpanel.net/cpanel/email/email-deliverability-in-cpanel/#dkim
Need further assistance?
If you require further assistance please contact the ProStack team and we can help get this resolved for you! Get in touch today!

![]()
![]()
![]()
