This guide will explain how to connect to a server using SSH.
What is SSH?
SSH stands for Secure Shell and is a protocol for secure data communication between two machines.
This protocol is typically used to log in to a remote machine securely and then execute commands on the machine.
This access and data transfer is done via a secure channel - meaning an encrypted channel.
This protocol can also be used to transfer files via SSH File Transfer Protocol (SFTP) or Secure Copy Protocol (SCP).
How do I Enable SSH Access?
Customers on our shared hosting packages already have SSH access enabled for them.
Cloud/Dedicated hosting customers can access their servers using the server credentials provided in the welcome email.
How do I connect to my server via SSH?
We do not support and also do not recommend SSH via password authentication as it is a major security risk.
We do offer key-based authentication to access your server via SSH and the following instruction should help you to achieve it.
Step 1 - Generating an SSH Key Pair
You may generate an SSH key pair via cPanel or from your local machine. Please refer to the below steps to find details depending on the operating system used on your machine.
Linux Machines
Run the command:
ssh-keygen -t dsa
OR
ssh-keygen -t rsa
The output will be similar to that shown on the snip below. The id_dsa or id_rsa will have the private key and id_dsa.pub or id_rsa.pub will be the public key.

Windows Machines
Download and install [Puttygen]
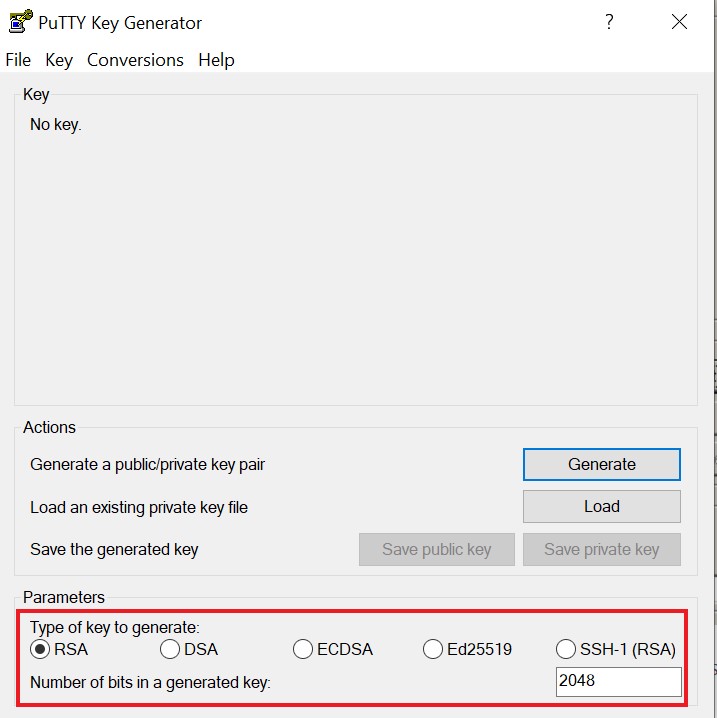
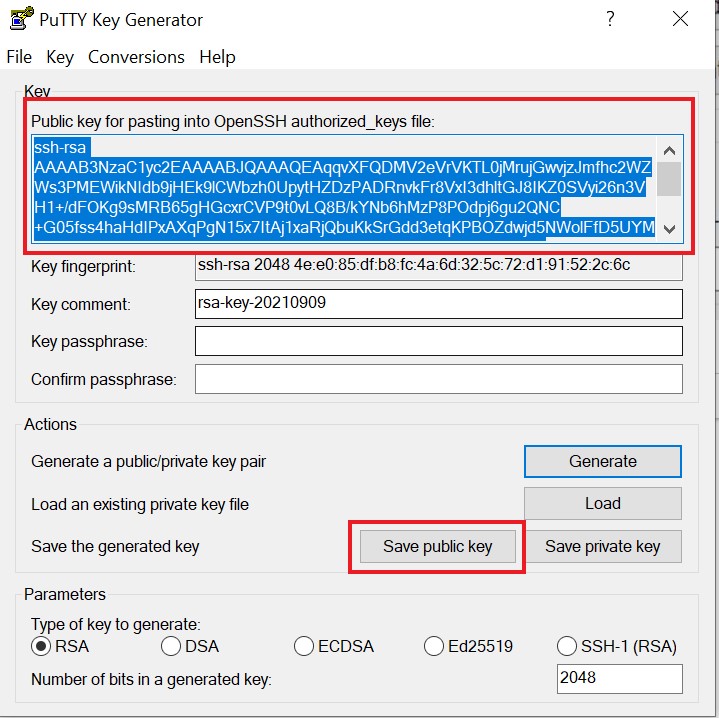
Open [Puttygen] and select the type of key as RSA (or DSA). Then click on Generate.
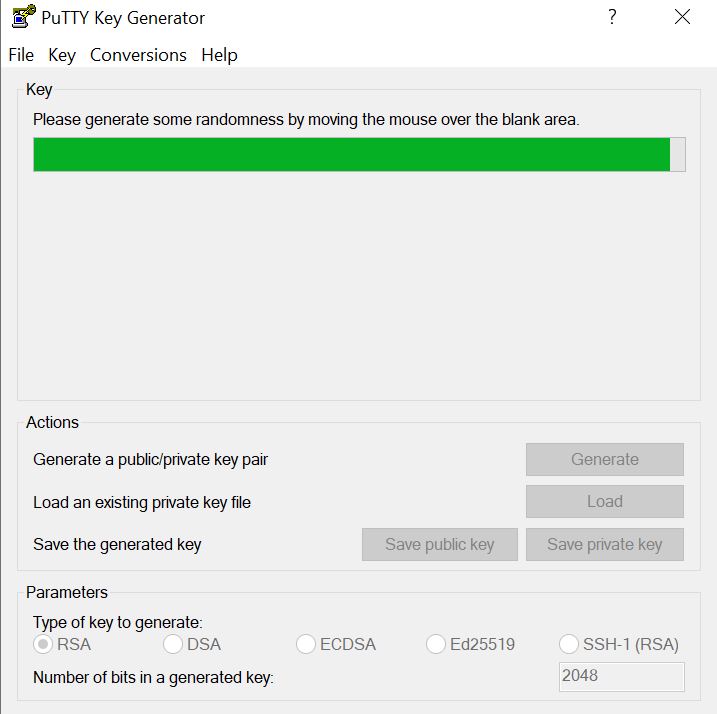
Hover over the empty space until the progress bar has filled.
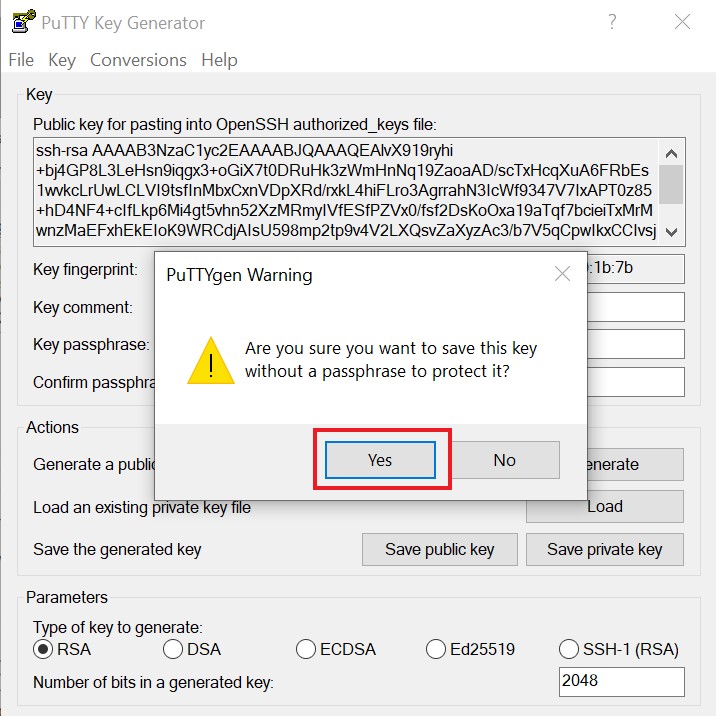
Click Save private Key button, without providing any passphrase - this will require you to click Yes when prompted to.
Make sure the private key file is saved appropriately eg: server-name_private_key.ppk
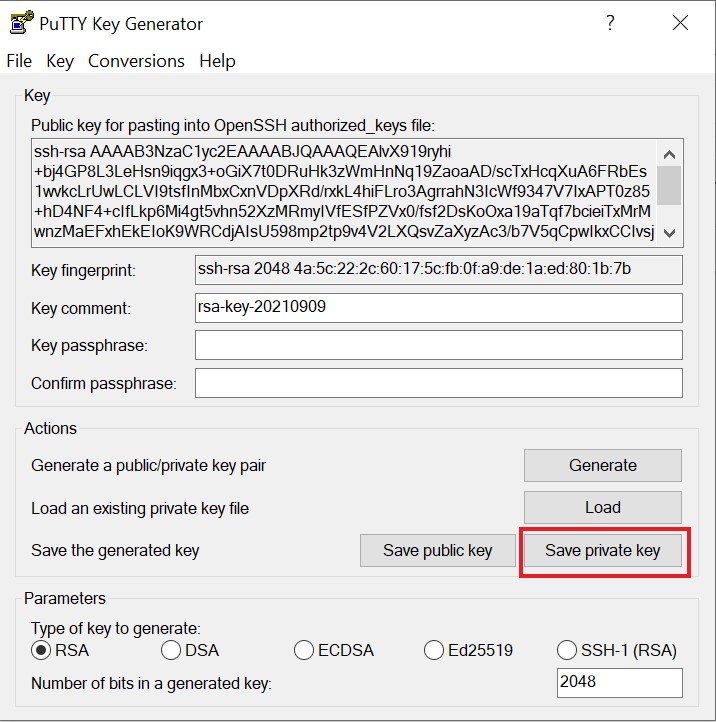
Now, copy the public key (or use the Save public key button to save it on your machine) from the highlighted section and import it to the server via cPanel or WHM.
Once imported, the key has to be authorised as well.
Mac OS X Machines
You can use the Terminal application on Mac OS X to generate an SSH key. To access the Terminal application, follow these steps:
- Open your Finder and select Utilities from the Go menu bar.
- Find the Terminal application in the list of utilities.
- Double-click the Terminal application to start it.
To generate SSH keys:
- Enter the following command in the Terminal window.
ssh-keygen -t rsa
2. Press ENTER to accept the default location. The utility prompts you for a passphrase.
3. You can either type in a passphrase or hit the ENTER key to accept the default (no passphrase).
After you confirm the passphrase, the system generates the key pair.
Your private key is saved to theid_rsafile and public key is saved to theid_rsa.pubfile in the.sshdirectory.
This public key needs uploading to the server for you to connect without any password authentication.
Step 2: Authorize the SSH Server to use the Public Key
In order to authorise the public_key that was generated above needs to be uploaded to the server.
This can be done from cPanel or WHM:
cPanel - [How do I add or manage SSH keys from cPanel? - Knowledgebase - Prostack]
WHM - [How do I add or manage SSH keys from WHM? - Knowledgebase - Prostack]
Step 3: Accessing the Remote Server
Accessing the server too depends on the operating system used on your machine.
Linux Machines
Run the below command from terminal.
ssh -l user remote-server
Windows Machines
Download and install [Putty]
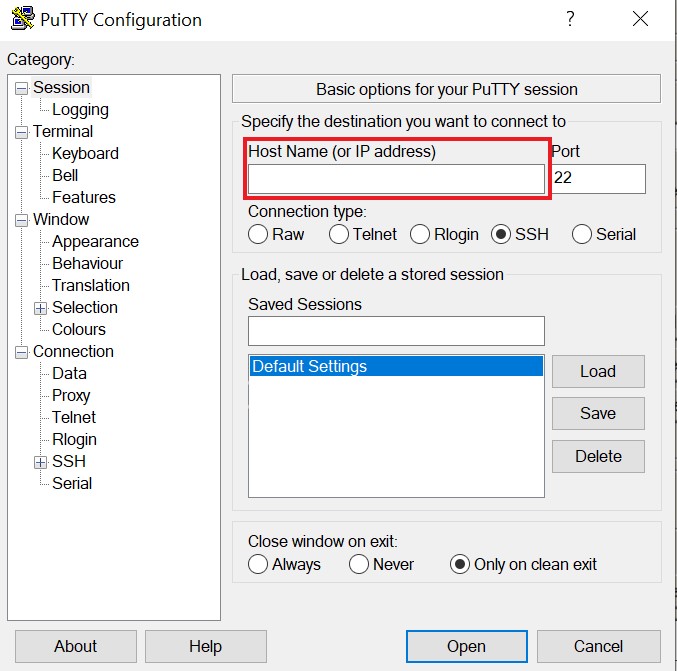
Open Putty and enter the Remote Host Name or IP Address.
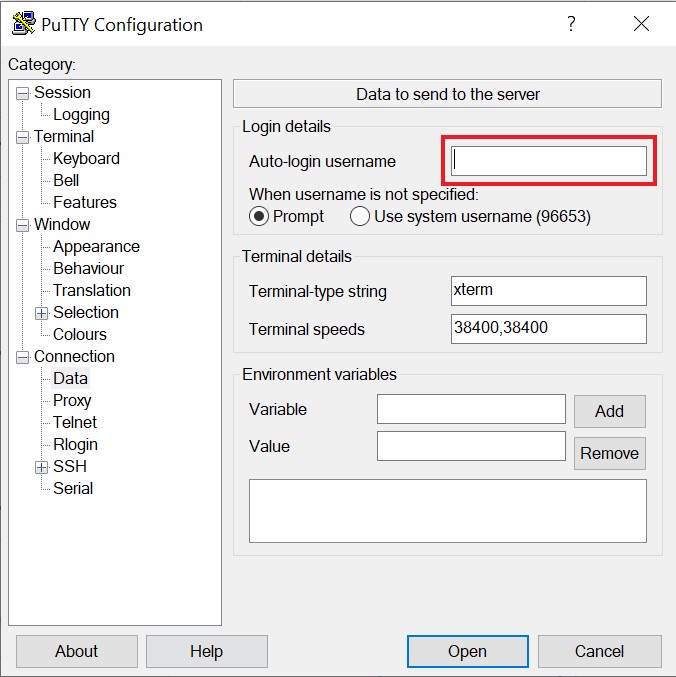
From the left column, click Data under Connection and enter the username in the Auto-login username field.
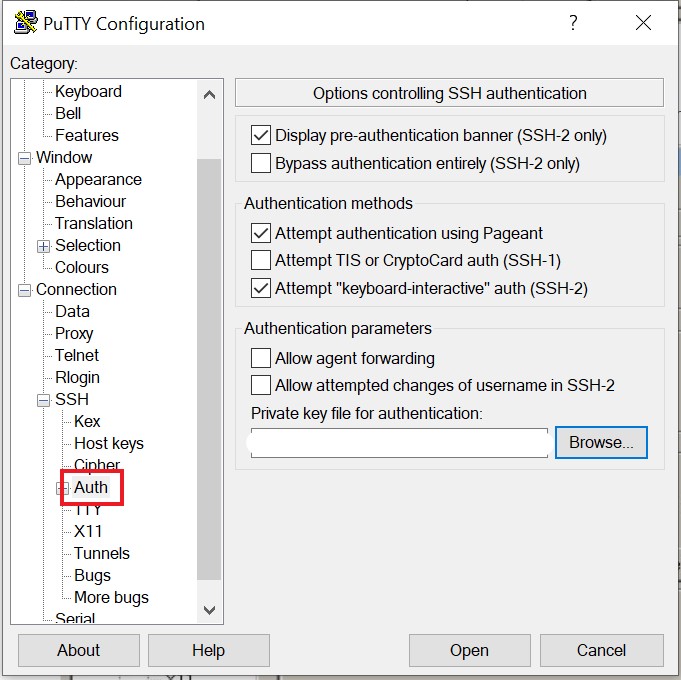
Next, click Auth under Connection > SSH and enter the path of the saved private key file. Once done, click on Open to connect to the server. Paste password when prompted.
MAC Machines
Run the below command from terminal.
ssh -l user remote-server
Need further assistance?
If you require further assistance please contact the ProStack team and we can help get this resolved for you! Get in touch today!


